Quickstart
This guide should take you 10 minutes to complete.
It's easy to build a GraphQL API using TakeShape. Follow along with our quickstart guide to set up a project and start calling your GraphQL API from your application.
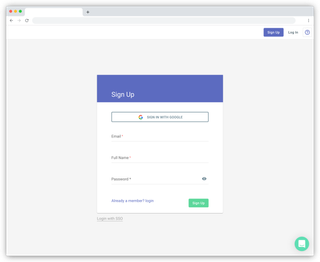
Create an account
Start by creating a free account.
Adding a credit card to a project will prevent service interruptions if the project exceeds tier limits. You can add a credit card in your project's billing settings.
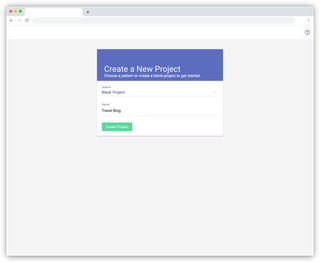
Create a project
Next, we'll create a blank project. For our Source, we'll select "Blank Project". Let's name our new project "Travel Blog".
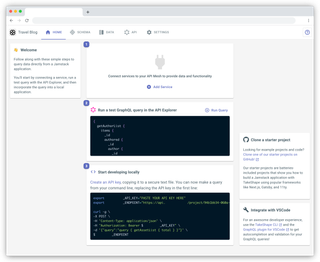
After project creation, you'll be taken to your project's dashboard. It offers quick access to the steps you'll need to finish setting up your project, which are the same as you'll find in this guide. We encourage you to stick with this guide for now, but know that the dashboard will always be there for you for future projects.
Connect a service
In the first step on the dashboard, select on the "Connect Service" link to add a new service. From the grid of available services, select the "GraphQL" provider. In the following form, fill in details for the public Countries GraphQL API:
- Name:
Countries - Slug:
countries - Namespace:
Countries - Endpoint:
https://countries.trevorblades.com/ - Authentication:
None
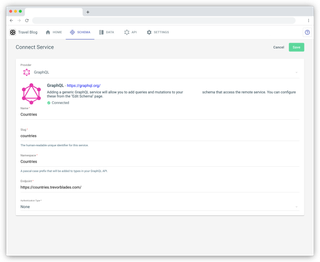
Once the service is configured, save it. The service will be introspected and suggest queries and mutations to add to your API. Go ahead and select the Countries_country query, which will return details of a specific country.
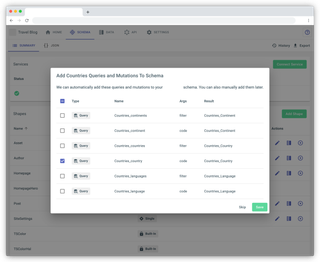
After selecting your query and selecting "Save", you'll see your schema now includes the query and all the remote shapes it depends upon:
Countries_ContinentCountries_CountryCountries_LanguageCountries_State
These shapes are added since they're all returned by the Countries_country query, and they all have the Countries namespace since they belong to the service.
Explore your API
Now it's time to test your new API. Use the API tab to switch over to the API Explorer. Paste in this query and select the "Run" button:
query Japan {
  Countries_country(code: "JP") {
    name
    emoji
    currency
    capital
  }
}
In the response, you'll get back information about Japan, along with some analytics about your query's performance. Open up the bottom Debugger panel to see more detail about how your requests perform.

Query your API from the command line
Finally, it's time to call your API from your local machine.
Here's the command:
export GRAPHQL_API_KEY="xxxx"
export GRAPHQL_ENDPOINT="xxxx"
curl -g \
-X POST \
-H 'Content-Type: application/json' \
-H "Authorization: Bearer $GRAPHQL_API_KEY" \
-d '{"query":"query Country($code: ID!) { Countries_country(code: $code) { name emoji currency capital } }"}' \
$GRAPHQL_ENDPOINT
You'll see that there's two pieces of data you need
The first thing you'll want to do is create a .env file in your project that includes the secrets GRAPHQL_ENDPOINT and GRAPHQL_API_KEY:
GRAPHQL_ENDPOINT=xxxxx
GRAPHQL_API_KEY=xxxxx
When you're in your project in the admin UI, you can find your project's endpoint in the sidebar of the API tab.
You can create an API Key from within the API tab. Pick the dev permission for your key, then save it. After saving, you'll be presented with a one-time secret string. Copy it into your .env file.
Once you've got your secrets, install some libraries to help make your request:
npm i --save node-fetch dotenv
To query the API make a request:
require('dotenv').config();
const fetch = require('node-fetch');

async function query(query, variables) {
  const res = await fetch(process.env.GRAPHQL_ENDPOINT, {
    headers: {
      Authorization: `Bearer ${process.env.GRAPHQL_API_KEY}`
    },
    method: 'POST',
    body: JSON.stringify({ query, variables })
  });
  return res.json();
}

const COUNTRY_QUERY = `
  query Country($code: ID!) {
    Countries_country(code: $code) {
      name
      emoji
      currency
      capital
    }
  }
`;

query(COUNTRY_QUERY, { code: 'JP' }).then((data) => console.log(data));
Run this file with node example.client.js and you'll see it return your data.
{
  "data": {
    "Countries_country": { "name": "Japan", "emoji": "🇯🇵", "currency": "JPY", "capital": "Tokyo" }
  }
}
Next steps
Keep reading
Continue reading the docs to become an expert at connecting services, querying your API, and unlocking the full power of your schema.
Explore starter projects
We've built a gallery of starter projects using different static site generators, application frameworks, and connected services to help kickstart your next composable project. Check out the repos, reference the code, and use them as the starting point for building on your own.