Work with Branches
While developing your API, you will probably want to try out changes before making them live for all of your end users. We make it easy to develop new functionality in isolation with branches.
Every project starts with a default branch named “production”. Every new branch you create will start as a copy of your “production” branch. Every branch has a dedicated URL for its unique GraphQL API and schema. This makes it easy to use a project's API branches during development.
A typical workflow may involve creating a branch in the web client to make your API changes, then moving to the command line to develop against your branch’s unique API endpoint, and finally merging your changes as part of your regular PR or CI workflow.
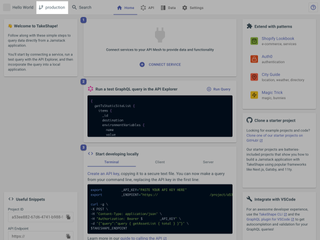
In the web client
While in a project, you can find the branch menu next to the project name. The branch menu will display the branch you’re currently viewing.
Your ability to use branches is limited by your role in a project:
- Admins can view, switch to, create, or delete any branch.
- Editors can view or switch to any branch.
- Viewers can view only the production branch.
Switch branches
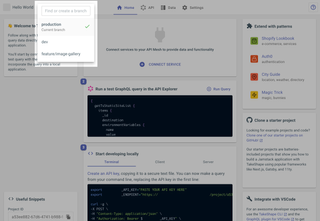
After opening the menu, you’ll see a list of all the branches in your project. If teammates or collaborators create their own branches, you’ll see them in this list, too.
Click on any branch to switch to it. If you have undeployed changes to your schema, you’ll be prompted to resolve those changes before switching.
Find or create branches
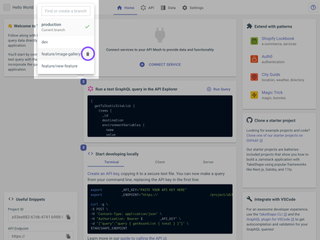
To find a specific branch by name, start by typing in the menu’s search field. It will reveal any branches matching what you type, as well as the option to create a new branch with the name you’ve typed in.

If you create a branch with the name you’ve typed in, you will be automatically switched to it. If you have undeployed changes to your schema, you’ll be propmted to resolve those changes before creating the branch.

Delete branches
To delete any existing branch, select the “Delete” icon next to the branch’s name in the list. You cannot delete the branch you’re currently on, nor can you delete the default “production” branch.
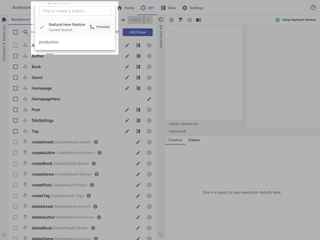
Promote branches
When a branch that is not your "production" branch is active, you'll have the option to promote that branch.
Promoting a branch will copy its contents into your "production" branch and then delete it. You'll be automatically switched to your "production" branch.
Be careful with this operation. It will immediately impact your project's production GraphQL API. This could lead to errors in any applications that consume it.
In a git-based development workflow
Below is an opinionated workflow that integrates API Branches into your git and project lifecycle. This workflow has been fully implemented in the Penny e-commerce project. Regardless, of your project and tech stack, Penny is a great place to look for examples on integrating the workflow into your own project.
Throughout this guide, examples will show deeper integrations, and how to use @takeshape/cli commands to perform the actions manually.
Permissions
Working with branches through the API requires an API key with branch permissions. The default dev and admin roles
have these pre-populated.
In the most likely scenario this means you will need to create an API key with a dev role,
and set the env variable GRAPHQL_API_KEY in your local project and remote CI environment.
Branch Creation
Assuming a git-based workflow, the first is to create a branch. You'll want to create API branches with the same name as your git branches. This allows you to work with the API branches in CI environments where the ephemeral nature of a preview branch makes hardcoding the branch name impractical.
In Penny this is handled via a git hook, installed via husky, which prompts you to create a branch whenever a new branch checkout is detected.
Note that below script is calling npm scripts that use a project-installed copy of shape-tools.
#!/bin/sh

if  "$3" == "0" ; then
  exit;
fi

if [ "$1" == "$2" ]; then
  set +e

  # Test whether a remote for this branch exists
  output=$(git rev-parse --abbrev-ref --symbolic-full-name @{u} 2>&1) && exit_status=$? || exit_status=$?

  if  $exit_status -eq 0 ; then
    exit
  fi

  if sh -c ": >/dev/tty" >/dev/null 2>/dev/null; then
    exec < /dev/tty
    npm run --silent takeshape:post-checkout-hook -- --tty
  else
    npm run --silent takeshape:post-checkout-hook -- --no-tty
  fi
fi
The same effect can be accomplished using the CLI:
$ takeshape branch create --name $(git rev-parse --abbrev-ref HEAD)
Developing Locally
While developing locally you can use the HEAD of your branch. In Penny, a Next.js project, we use the shape-tools lib
to set the process.env variable:
import { setProcessBranchUrl } from '@takeshape/shape-tools';
await setProcessBranchUrl({ envVar: 'NEXT_PUBLIC_GRAPHQL_API_URL' });
Using the CLI, you could export an env variable:
$ export GRAPHQL_API_URL=$(takeshape branch url --name $(git rev-parse --abbrev-ref HEAD)) && npm run dev
Creating a PR
When you create a PR you will want to use the same API branch for your preview builds. In Penny this is accomplished with the same
snippet as above for local development. The shape-tools utility function will sniff out one of the known build
environments, like Vercel or Netlify, and get the required params to tag the head and return it as a versioned URL.
Using the CLI you can do something similar, though what variables you use will depend on the environment you are working in:
$ takeshape branch tagVersion --name $HEAD_REF --tag $COMMIT_SHA
Merging a PR
Please note that GitHub Merge Queues are not compatible with an API branch workflow. This is due to the lack of branch names provided in the merge queue run, and the unique SHA created. You can still use a Merge Queue, but you won't be able to run CI that depends on synchronization with an API branch.
Typical workflows involve merging an approved PR into the default branch, we'll use main in this case. In Penny this is
accomplished via a call to shape-tools during the prebuild script:
{
  "prebuild": "shape promote-branch --lookup-pr --production-only",
  "build": "next build"
}
Note the additional flag, --lookup-pr which allows this to run in a build environment, like Vercel or Netlify, that will need to
get more information about the merged branch from the GitHub API.
Penny also has a git post-merge hook set up that will merge your API branch after your git codebase merge completes.
Note that this hook is calling to a shape-tools function which provides both an interactive version for TTY terminals,
and an automatic version, for integrations like the VSCode git tools.
#!/bin/sh

if sh -c ": >/dev/tty" >/dev/null 2>/dev/null; then
  exec < /dev/tty
  npm run --silent takeshape:post-merge-hook -- --tty
else
  npm run --silent takeshape:post-merge-hook -- --no-tty
fi
Using the CLI you can use the branch promote command, but will need to tailor it to your build environment.
$ takeshape branch merge --head my_feature_branch
Deploying Production
Similar to the preview deployment above, it is recommended you use a versioned URL for your production builds and
deployments. This allows you to keep your code deploys and your API deploys in sync. None of the changes you're
making to the API prior to invoking your site build will have any effect on a site running a versioned URL, which looks
like this: api.takeshape.io/project/PROJECT-ID/production/BRANCH-ID/graphql
In Penny this is handled via that same call to the setProcessBranchUrl in the shape-tools lib, which will tags and
supplies a versioned URL to the Next.js build process.
Using the CLI, you'd use a similar process as well, depending on environment variables in your CI service:
$ takeshape branch tagVersion --name $HEAD_REF --tag $COMMIT_SHA
Still need help? Get in touch with us.