Working with Netlify Functions
In this guide we'll show you how to use Netlify functions to request data from your API and provide it to your frontend apps. We're going to create a new project that has data for an Ecommerce store, and we're going to display that data with React.
Let's get started.
Follow along with this guide by checking out our starter project repo. Our starters let you instantly deploy a pre-configured project.
Setting up your project
First, navigate to a folder where you'd like to keep your project. You'll need to use NPM's create-react-app tool:
npx create-react-app netlify-example
Great. Now open up this new project in your favorite IDE, or change directories into it:
cd netlify-example
The final step before connecting to Netlify is setting up a remote repo.
The most popular place to host a remote repo for your project is github, but feel free to use any host. Once you've got one set up, enter the following into your terminal at the root directory of your project:
git remote add origin your-repo-url-here
You'll need that to connect to Netlify.
Connecting your React app to Netlify
You have your frontend configured, so now let's go through connecting that frontend to Netlify. Note that you'll need your frontend project to be connected to a remote repo in git, either with github or another provider. This is how Netlify connects with your project.
Once you're ready, install the netlify cli:
npm install netlify-cli -g
Now log in through the CLI.
ntl login
It should open Netlify in your default browser and ask you to authorize your app to access your account. If you don't have a Netlify account, you can sign up for one here.
Now you need to initialize your project with netlify. Enter the following command and follow along with the CLI instructions:
ntl init

You will need to authorize Netlify to have access to your frontend project's repository. Be sure to grant access so you can successfully connect this project to Netlify Functions.
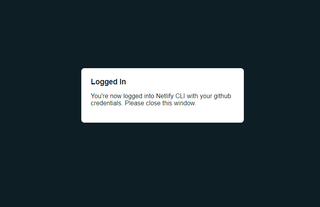
If all goes well, you should be taken to a page that tells you you've successfully logged into Netlify CLI with your github account.
Continue following the CLI instructions, which will require you to set your build command and the directory you'd like to deploy.
If all is successful, you'll see a message that says "Success. Netlify CI/CD Configured."
You may also be asked if you'd like to set up a Netlify.toml file, which your Netlify CLI will use to properly deploy your site.

For more information on working with React, check out our guide on the topic.
Otherwise, let's keep building this thing out.
Setup
To connect to your project, you need your API Endpoint and an API key.
If you haven't created a project yet, follow this guide to do so.
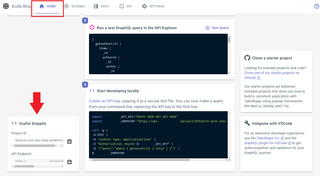
If you already have a project, your API Endpoint will be in the admin UI. In the home tab, look for the "Useful Snippets" section.
Copy the API Endpoint and save it somewhere secure.
To get an API Key, you'll have to create one. Read our docs on creating an API Key here.
Getting your API Key and API Endpoint
Time to grab your project's API key and API endpoint. To find your endpoint, navigate to the admin UI and open up your project page.
In the home tab, you'll find your API Endpoint listed at the bottom left, in a small modal.
Now you just need an API Key. You can check out our docs on creating an API Key if you haven't yet done that.
Adding your API Key and Project Endpoint to your React project
To access your project's data, you'll need to set up a few environment variables. Navigate to your project's root directory and create a .env file. You just need to add two lines to it, substituting in your API Key and API Endpoint.
REACT_APP_GRAPHQL_API_KEY=Your-Key-Here
REACT_APP_GRAPHQL_ENDPOINT=Your-Endpoint-Here
Creating your Netlify Function
In the root directory of your React project, if you haven't already, create a netlify directory. Create a functions folder within this directory. This is where you'll store your functions.
Create a file called fetch-products.js, where we'll define a function that passes a query property as the body of the request.
Here's how it should look:
import fetch from 'node-fetch';

exports.handler = async function () {
  try {
    const result = await fetch(process.env.REACT_APP_GRAPHQL_ENDPOINT, {
      method: 'POST',
      headers: { Authorization: `Bearer ${process.env.REACT_APP_GRAPHQL_API_KEY}` },
      body: JSON.stringify({
        query: `query {
                        getProductList{
                            items{
                                price
                                name
                                _id
                                image{
                                    sourceUrl
                                }
                            }
                        }
                    }
                    `
      })
    });
    const resultJSON = await result.json();
    /**
     * Must return an object with a statusCode
     * and a body
     */
    return {
      statusCode: 200,
      body: JSON.stringify(resultJSON)
    };
  } catch (err) {
    return {
      statusCode: 500,
      body: JSON.stringify({
        message: `Failed to fetch. ${err}`
      })
    };
  }
};
The above code makes a fetch request and returns the result as a body property on the response that the frontend will get when they call this function. If the fetch request fails, it will return an object with an error message instead.
No matter what you're returning, Netlify Functions require you to return a statusCode and body.
Our request is fetching the list of all products from our project, including their names, prices, id's and images. We'll use this data on the frontend to display these products.
You can't use fetch in a Netlify Function without installing node-fetch. Netlify Functions use node to execute their code.
In your terminal, enter npm i node-fetch
To learn more about Netlify Function handlers, check out their docs.
With that code, your function is done. Now we just need to write the code to display it on the frontend.
Calling your function from the frontend
Calling your Netlify Functions from the frontend is simple. Wherever it is that you need the data from your Netlify Function, just make a standard fetch request:
const result = await fetch('/.netlify/functions/your-function');
const resultJSON = await result.json();
This is the code we'll call in our App.js. Navigate to the src/App.js file in your React project, and delete all the code in the App component function.
You'll first need to import useState and useEffect. Then in the useEffect hook call, fetch your fetch-products function.
import { useState, useEffect } from 'react';

function App() {

  const [productList, setProductList] = useState(null);

  useEffect(() => {
    (async ()=>{
      try{
        const result = await fetch('/.netlify/functions/fetch-products');
        const resultJSON = await result.json();
        setProductList(resultJSON.data.getProductList.items);
        console.log(resultJSON);
      } catch (err){
        console.log('Failed to do netlify function', err);
      }
    })();
  }, [])

  return (
      //code here
  )
As you can see in the above code, we're fetching from the /.netlify/functions/ directory, with a . period before the netlify directory name. This is required when using Netlify Functions. Read the Netlify docs to learn more.
We're also creating a productList state and setting it as the items we retrieved from our API.
Now we just need to render the list in a JSX template.
return (
  <main style={{ width: '50%', margin: 'auto', display: 'flex', flexDirection: 'column' }}>
    {productList &&
      productList.map((product) => (
        <div key={product._id} style={{ display: 'flex', flexDirection: 'column' }}>
          <img style={{ maxWidth: '800px' }} src={product.image.sourceUrl}></img>
          <h2>{product.name}</h2>
          <b>{product.price}</b>
        </div>
      ))}
  </main>
);
The above code will render each product in a list. We're all done.
Here's what the full App.js should look like:
import { useState, useEffect } from 'react';

function App() {
  const [productList, setProductList] = useState(null);

  useEffect(() => {
    (async () => {
      try {
        const result = await fetch('/.netlify/functions/fetch-products');
        const resultJSON = await result.json();
        setProductList(resultJSON.data.getProductList.items);
        console.log(resultJSON);
      } catch (err) {
        console.log('Failed to do netlify function', err);
      }
    })();
  }, []);

  return (
    <main style={{ width: '50%', margin: 'auto', display: 'flex', flexDirection: 'column' }}>
      {productList &&
        productList.map((product) => (
          <div key={product._id} style={{ display: 'flex', flexDirection: 'column' }}>
            <img style={{ maxWidth: '800px' }} src={product.image.sourceUrl}></img>
            <h2>{product.name}</h2>
            <b>{product.price}</b>
          </div>
        ))}
    </main>
  );
}

export default App;
Now to see your work, enter ntl dev into the terminal and open your browser to localhost:8888.
You should see the list of products.

Still need help? Get in touch with us.