Importing Data
Though it's super easy to use our web client to add and manipulate data for your project, you can also manage your data externally. .jsonl files can be used to import data that matches the shapes defined in your schema.
Let's walk through the process of bulk-importing data with a data.jsonl file.
Configuring a pattern
The first step to importing data into your project is creating a pattern. A pattern is a directory that contains information about the configuration of your project.
In a project, data is one component of a pattern. Your pattern's data lives in a data.jsonl file, which you can add to your own pattern directory or find in the pattern directory of your projects.
To get started with a pattern, you can create your own, use one of our pre-made patterns, or export a pattern from a project. Here's how to do all three.
Create your own pattern
You can create your own pattern by following our doc on the subject.
Follow along with this guide by checking out our starter project repo. Our starters let you instantly deploy a pre-configured project.
Export a pattern
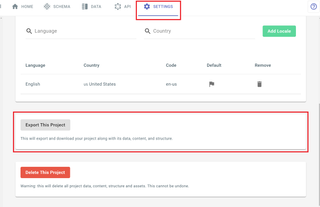
If you have a project, you can follow this guide to learn how to export it. The exported folder will contain a .pattern directory, which will have schema.json, pattern.yaml and data.jsonl files. Learn more about pattern directories here.
Editing your data.jsonl
Once you have a pattern with a data.jsonl file in it, it's time to add some data.
Data can be set with the JSON Lines format, which you can read more about on the official website. Essentially, each piece of data is represented as a JSON object on a single line with no spaces between the properties.
A valid jsonl line could look like this:
{ "_id": "1234-5678-abcd-efgh", "_shapeName": "MyShape", "name": "Data name here" }
Each line in your jsonl file must have a _shapeName or _shapeId property, and each line must also have the required properties of the shape assigned to the line.
Required properties
There are three required properties for all lines in a data.jsonl file:
_id: A uuid representing the line._shapeNameOR_shapId: The name or id of the shape of the data in the line. If both are specified,_shapeIdtakes precedence.
Any other required properties will be defined on the shape you're using. You can follow our guide on editing shapes in the web client if you'd rather not interact with code. Otherwise, check out our doc on editing a schema in json.
An example
Let's look at an example of editing a line in a data.jsonl file.
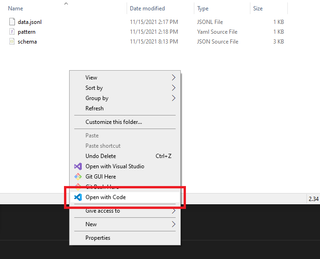
Your pattern should be a folder/directory with schema.json, pattern.yaml and data.jsonl files. Refer to the section on configuring a pattern above if you don't know how to set the directory up.
Assuming your directory is set up well, open it in Visual Studio Code. You can do so on windows by right-selecting within the directory and selecting "Open with Code". Alternatively, if you're using a terminal on any operating system, you can navigate to the pattern directory and enter the code . command.
If your data.jsonl file isn't empty, scroll to the bottom and start on a new line. You can start with a line that contains your required properties:
{ "_id": "create-your-own-uuid", "_shapeName": "MyShape", "name": "Data name here" }
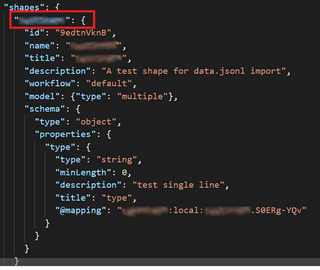
To create an ID, you can use a uuid-v4 generator. The name can be anything. To get a Shape ID, navigate to your schema under the shapes property. Any shape in your schema is eligible, but for this example let's assume you have a shape called Test Shape with an ID of 9edtnVknB, a required name and an optional title property.
To add content of this shape to your project, you could add the following line to your data.jsonl file:
{ "_id": "0ebb6369-b236-4438-b48a-750200bb350e", "_shapeName": "TestShape", "name": "Import test name.." }
Note that in the above json line, there's a valid value in the _id field. This was generated randomly by a tool, and you're free to use any tool for the job, so long as it's a valid uuid-v4. There are websites that generate them, and NPM packages you can use in code.
Also note that no title property is included. This is because title was an optional property, and you're safe to import data of the specified shape without it.
Importing data
To import this data back into your project, you can save the directory as a zip or upload it to a Github repository. Either way, you'll have to create a new project and import it when setting the project up. We have a guide to walk you through the process.
Still need help? Get in touch with us.