Salsify
Salsify is an online platform for e-commerce product content management. This guide will walk you serving Salsify product data from a high-performance GraphQL API.
Don't have a project yet? Check out this guide for setting one up.
Connecting Salsify
Getting Salsify IDs and API key
First we are going to locate some necessary parameters in your Salsify account. Log in to Salsify ProductXM and navigate to the channel you want to connect to.

Take note of the URL; it looks like this:
https://app.salsify.com/app/orgs/s-04d97b0f-609e-4efd-8473-1b7ca9168049/channels/403645
After /orgs/ is your Organization ID. In this example it's s-04d97b0f-609e-4efd-8473-1b7ca9168049. After /channels/ is your Channel ID. In this example it's 403645.
Next, navigate to your user profile using the navigation in the upper right. It looks like this:

Click "Show API Key" and copy your API key.
Adding the Salsify service
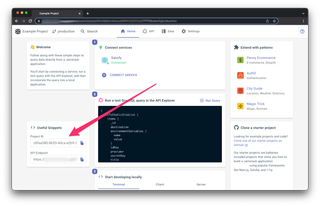
Now you're ready to configure your Salsify service. Log in to your project then click "Connect Service" on the Home page. Click "Salsify" to start configuring your Salsify service. You can use whatever Name, Slug, and Namespace you want: using the name "Salsify" works for example. For the Organization ID, Channel ID, and API Key fields, enter the IDs and key you collected in the previous step. Take note of the slug value that you choose for later.
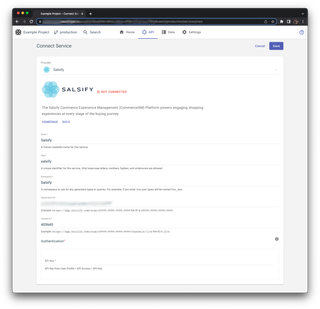
Click Save when you are finished. You'll be forwarded to the API tab.
Selecting Queries & Mutations
Next we'll configure your schema to automatically index product information from Salsify when it is published.
First, make sure the "Patterns & Services" panel on the left is open by clicking the vertical divider that says "Patterns & Services" if it is not.
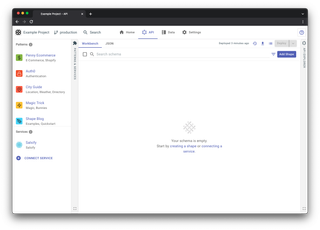
Click the context menu next to your Salsify service and click "Add Queries/Mutations".
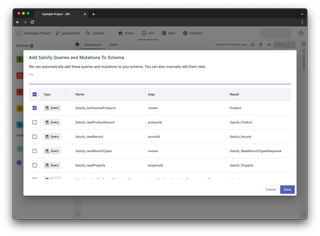
Select the Salsify_listChannelProducts query (the Salsify_ prefix may be different based on your service configuration) and click Save.
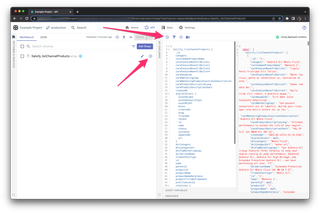
You can verify that everything is set up correctly so far by previewing the query. Click the "Preview in API Explorer" icon next to the query, then click the "Run Query" icon. This will display the products data returned from the query as shown.
Indexing Configuration
Next we'll add an indexing configuration to your schema. This will index your product data after a Salsify publish. Click "JSON" to display the schema JSON editor. Paste the following configuration as a top-level property as shown in the screenshot. Note again that the Salsify_ prefix might be different based on your service configuration.
{
  "shapes": {
    "Salsify_Product": {
      "name": "Salsify_Product",
      "id": "Salsify_Product",
      "schema": {
        "extends": [{ "@ref": "salsify:Product" }]
      },
      "loaders": {
        "list": {
          "query": "salsify:Query.listChannelProducts"
        }
      },
      "cache": {
        "enabled": true,
        "triggers": [
          {
            "type": "webhook",
            "query": "list",
            "service": "salsify",
            "events": ["publication"]
          }
        ]
      }
    }
  }
}

When you're ready, click Deploy.
Setting up webhook
Now the project is ready to receive your product data when it is published. All that is left to do is to add the webhook that notifies your project when a publish event happens.
Make note of your project ID. You can find it in the URL or on the Home page.
Log back in to Salsify ProductXM and navigate to your channel. Click the Notifications tab. Enable "Call Webhook: Successful Publication" and enter the following URL, replacing YOUR_PROJECT_ID with your project ID from the previous step and replacing YOUR_SERVICE_SLUG with your Salsify service slug from earlier.
api.takeshape.io/project/PROJECT-ID/indexing-webhook/YOUR_SERVICE_SLUG
For example, your webhook URL will look something like this:
api.takeshape.io/project/d11d7923-e040-47bf-ad08-bfd9a338f00b/indexing-webhook/salsify
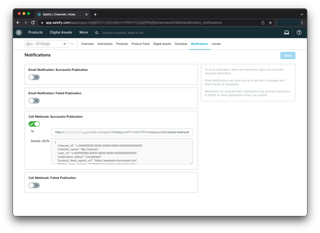
Now click Save.
Testing the integration
The next time you publish your Salsify channel the product data will be indexed.
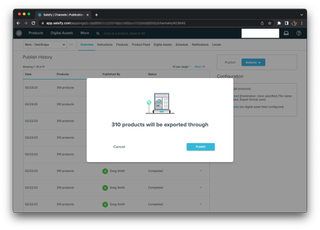
Only execute a publish if you are sure it is OK to do so. Other services may be affected.
You can initiate a publish from the channel overview page.
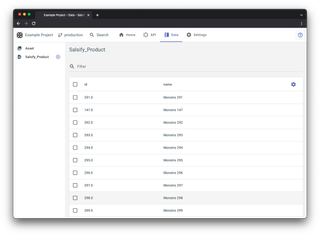
Back in your project, you can preview the indexed data by clicking Data in the top navigation then clicking the Salsify product Shape name on the left.
If you are curious to learn more about the indexing job or need to diagnose a problem, take a look at the API Indexing Log. You can reach it using this icon on the API Workbench.
If everything is set up correctly, you will see a successful job here after the publish webhook fires.

If a job failed, debugging information is provided here. Learn more in our API Indexing Guide.
Using the integration
Your application should use a query the API index. The Salsify_listChannelProducts query we added earlier is used for creating the index and does not query the index itself.
The built in search query searches all indexed data which can be useful testing but let's add a new query that is specific to the Salsify product data that is being indexed. Add this under the "queries" property in the schema JSON editor:
"getIndexedProductList": {
  "shape": "PaginatedList<Salsify_Product>",
  "resolver": {
    "shapeName": "Salsify_Product",
    "name": "takeshape:queryApiIndex",
    "service": "takeshape",
    "options": {"indexedShape": "Salsify_Product"}
  },
  "description": "Fetch Salsify products from the API Index.",
  "args": "TSListArgs<Salsify_Product>"
}
When you run this query, you'll find that it is much faster than the unindexed query. You can see profiling information in the Debugger panel.

To learn more about querying the GraphQL API from your app, check out our guide for using the GraphQL API.
Still need help? Get in touch with us.