REST
You can add any REST API as a service. When you combine REST APIs with custom Queries & Mutations, you can enable custom functionality in your project's GraphQL API.
Connecting a REST service requires you to know the endpoint you're connecting to and any authentication requirements it has.
Here are some eCommerce REST APIs you can try:
If you'd rather play around with a simple API already populated with data, try any of these:
In the following walkthrough, we'll use the Recharge Subscriptions API).
Connect a REST service
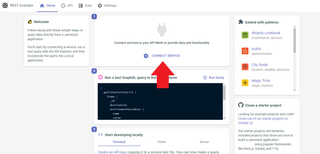
You can connect your REST service from the home tab of your project by selecting Connect Service.
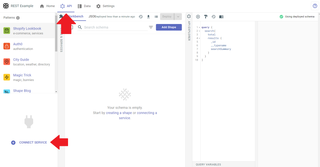
You can also connect a REST service from your project's API tab. Expand the Patterns & Services panel and select Connect Service. Select the REST service.
Here you can connect the Recharge API by providing a basic Name and Slug for your service, then defining the Endpoint, which in thise case is https://api.rechargeapps.com.
Recharge requires bearer token authentication, which is one of the three types of authentication we currently support. Our full list includes:
- Query Parameter When using Query Parameter authentication, the Query Param and Token will be appended as a query string parameter to the API endpoint's URL.
- Bearer Token allows you to enter a custom header and a Token value. For example
X-Recharge-Access-Tokenmight be the Header value, with your generated token as the Token value. You may add a Prefix, which will be prepended to the front of the Token string. If your Header isAuthorization, a prefix ofBearerwill be automatically prepended to your Token for you. - Basic Auth This option allows you to enter a simple Username and Password for APIs that require those credentials for access.
To authenticate Recharge, choose Bearer Token authentication, then set the Header to X-Recharge-Access-Token and the Token to your Recharge API token. You can acquire one by signing up for a free Recharge account now. Set your endpoint to https://api.rechargeapps.com.
When your service is fully configured, select Save.
Create a query or mutation for a REST service
After connecting your REST service, you can add queries and mutations that fetch or alter your API data.
Navigate to the API tab in your project, then select the JSON tab in your workbench.
Using the connected Recharge service, this guide will show you how to create get and list queries for your Recharge products.
{
  listAllRechargeProducts {
    id
    title
  }
}
{
  getRechargeProduct(id: 123456) {
    id
    title
  }
}
Define your list query
In the root-level queries object in your schema, add the following query object:
"listAllRechargeProducts": {
  "shape": "Recharge_ProductList",
  "resolver": {
    "name": "rest:get",
    "service": "recharge",
    "path": "/products"
  },
  "description": "Get Recharge products."
}
The above configuration creates a GET query to https://api.rechargeapps.com/products with the header and token you provided when you configured your Recharge service. The query's shape property specifies the shape of the query's response, including all properties you expect each product to have. The resolver property tells the query how to fetch the data from recharge. The path property within the resolver specifies the path that will be appended to the service's endpoint.
Your shape here should be a Recharge_ProductList because this query will return an array that lists every product you've added to Recharge. The shape name is arbitrary, but it should match the name of a shape defined in your root-level shapes object in your schema.
You can define the Recharge_ProductList shape by adding the following to the shapes object in your schema.
"Recharge_ProductList": {
  "id": "Recharge_ProductList",
  "name": "Recharge_ProductList",
  "title": "Recharge_ProductList",
  "schema": {
    "type": "object",
    "properties": {
      "products": {
        "type": "array",
        "items": {"@ref": "local:Recharge_Product"},
        "title": "products"
      }
    }
  }
},
The above shape configuration specifies a Recharge_ProductList shape that has a products property which is an array. The items property specifies the shape of each item in the products array, which is Recharge_Product. You have to add local: to Recharge_Product to indicate that the shape is defined locally in your schema.
The "@ref" property is used to point to a shape in the schema. Read more in our schema spec reference.
Now you should define the Recharge_Product shape. Add the following to your root-level shapes object.
"Recharge_Product": {
  "id": "Recharge_Product",
  "name": "Recharge_Product",
  "title": "Recharge_Product",
  "schema": {
    "type": "object",
    "properties": {
      "id": {"type": "number", "title": "ID"},
      "title": {"type": "string", "title": "title"}
    }
  }
}
Now hit the Deploy button above the workbench.
You can define more properties on your Recharge_Product if you'd like. For example, a typical Recharge product looks like this:
{
  "id": 12345,
  "collection_id": null,
  "created_at": "2022-03-09T12:49:08",
  "discount_amount": 0,
  "discount_type": "percentage",
  "handle": "hat-test",
  "images": {
    "large": "https://blah.com/img.jpg",
    "medium": "https://blah.com/img.jpg",
    "original": "https://blah.com/img.jpg",
    "small": "https://blah.com/img.jpg"
  },
  "product_id": 1234567891011,
  "shopify_product_id": 1234567891011,
  "subscription_defaults": {
    "charge_interval_frequency": 30,
    "cutoff_day_of_month": null,
    "cutoff_day_of_week": null,
    "expire_after_specific_number_of_charges": null,
    "modifiable_properties": [],
    "number_charges_until_expiration": null,
    "order_day_of_month": null,
    "order_day_of_week": null,
    "order_interval_frequency_options": ["30"],
    "order_interval_unit": "month",
    "storefront_purchase_options": "subscription_and_onetime"
  },
  "title": "product title",
  "updated_at": "2022-22-16T13:29:15"
}
Reference your API's documentation as well as our guide for working with shapes to learn more.
Define your get query
To get a specific product, Recharge requires you to add that product's id to the endpoint's path, like https://api.rechargeapps.com/products/123456. The resolver property comes with a path property that allows you to specify how the path of a query is serialized.
In this case, the resolver will look like this:
"resolver": {
  "name": "rest:get",
  "service": "recharge",
  "path": {
    "ops": [{"path": "id", "mapping": "$args.id"}],
    "serialize": {
      "template": "/products/{id}"
    }
  }
},
With the ops property, you can set your resolver to fetch the id value from the query's arguments. The serialize property then allows you to map that value to the path the query will fetch its data from. Below is the full query you should add to your queries:
"getRechargeProduct": {
  "shape": "Recharge_Product",
  "resolver": {
    "name": "rest:get",
    "service": "recharge",
    "path": {
      "ops": [{"path": "id", "mapping": "$args.id"}],
      "serialize": {
        "template": "/products/{id}",
        "defaults": {"style": "simple", "explode": false}
      }
    },
    "results": {
      "ops": [
        {
          "path": "$",
          "mapping": "get", {"path": "$resolvers[0].product"}
        }
      ]
    }
  },
  "args": {
    "type": "object",
    "properties": {
      "id": {
        "type": "integer"
      }
    }
  },
  "description": "Get a Recharge product."
}
Because Recharge's endpoint wraps the product data in a product object, the response will not match the Recharge_Product shape you've specified in the query's shape property. To "unwrap" this data by pulling it out of the product object, you'll have to map the result using the results property as shown in the query's resolver above. Read more about mapping query results in our schema spec reference.
Because you'll need an id to serialize into the path of the query to fetch the specified product, an args object must be defined in the query, outside of the resolver. Read more about mapping args to your query's path in our schema spec reference.
Now hit the Deploy button above the workbench.
Advanced Configuration
XML Support
If a REST endpoint returns a response with an XML content type, it will automatically be converted to JSON using fast-xml-parser. You can customize the parser behavior in the service options, as seen in the following example. Refer to the fast-xml-parser documentation for more information.
{
  ...
  "services": {
    "myservice": {
      ...
      "options": {
        ...
        "fastXmlParser": {
          "preserveOrder": true
        }
      }
    }
  }
}
Learn more
You now have the basics for querying any REST service.
- Learn more about working with shapes.
- Learn more about working with queries & mutations.
- Learn how to connect a GraphQL Service.
Still need help? Get in touch with us.